
Installation
Heave Stopper Storage & Installation

1. The boards must be kept dry, stored off the ground and on the delivery pallets to prevent any moisture ingress whilst in storage. Stacked pallets must not exceed 2 high. The protective cover must not be removed until ready for use.

City skyline
2. Ensure that the area is free of surface water. Heave Stopper must not be placed in waterlogged ground. Lay a sand, shingle or concrete blinding to provide a level bed for the boards to rest on with no pressure points to the underside

City skyline
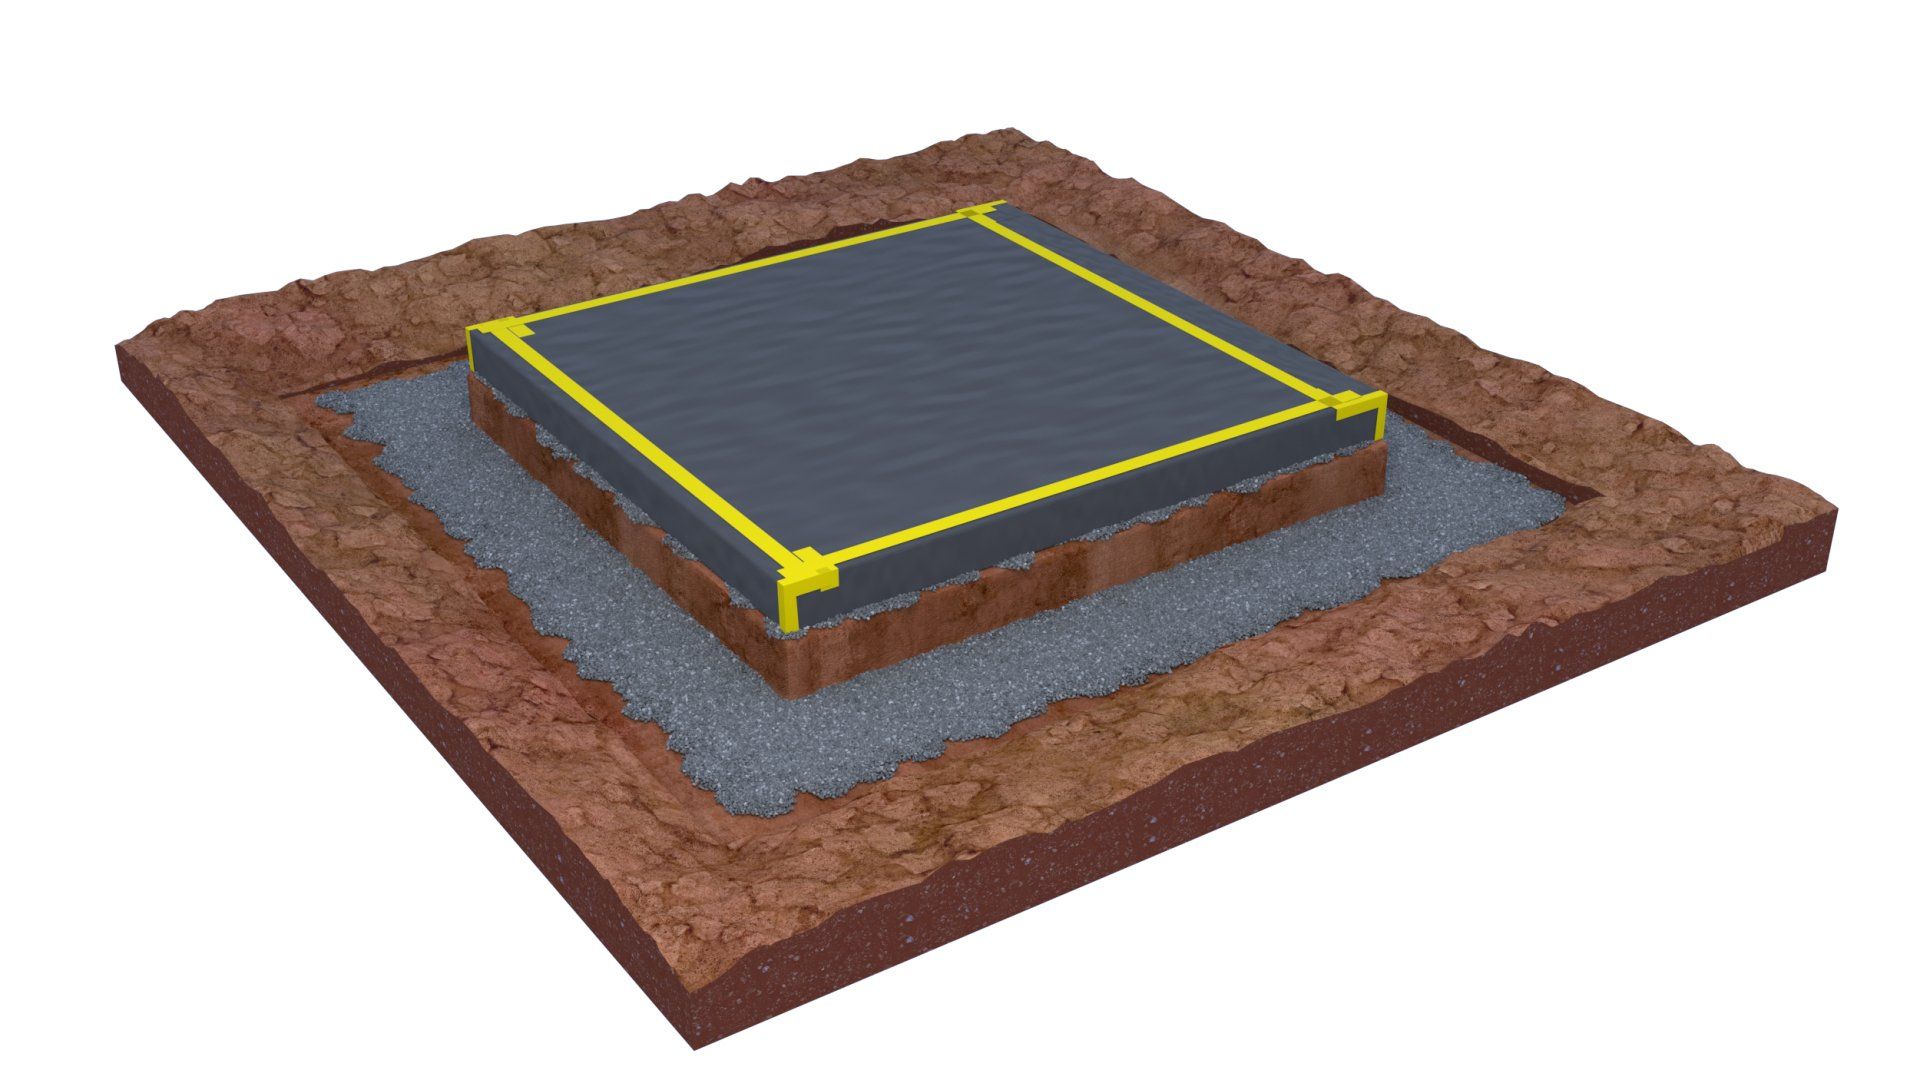
3. Lay minimum 125mu (500 gauge) polythene the full width of the excavation and tape all joints. Pay attention to detailing around pile penetrations and corners to ensure a watertight seal. Good practice requires that enough polythene is laid to fold over the Heave Stopper boards to lap with the top layer of polythene. Position Heave Stopper boards.

City skyline
4. Fold over the polythene from the bottom layer to the top face of the Heave Stopper boards and tape all joints.
City skyline
5. Lay minimum 125mu (500 gauge) polythene over the Heave Stopper boards and tape all joints. Ensure there is a good seal where bottom layer of polythene meets tops layer of polythene.
Fix reinforcement.

City skyline
6. Use enough spacer blocks to avoid load points and lay the reinforcement. Make provision to introduce water into the Heave Stopper boards by way of the Void Pipe. A Void Pipe is required every 25m2 or for every isolated area of Heave Stopper. Tie the Void Pipe to adjacent reinforcement to hold upright during concrete pour.

City skyline
7. Pour concrete and allow enough time to elapse for the concrete to become self supporting.

City skyline
8. Introduce water into the Heave Stopper boards by
inserting a hose pipe into the Void Pipe. Flood with enough water to ensure total saturation of the Heave Stopper.
Once the saturation process is complete, strike through the bottom facing and polythene to allow the water to drain.
Pipe sections can now be sealed off with cement or sealant.